Nobody Backs Up Until It's Too Late — Build a Free 3-2-1 Backup System on Windows This Weekend
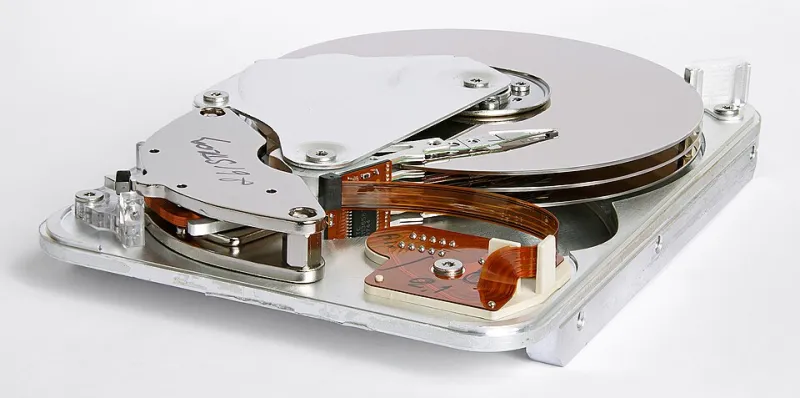
Photo: Eric Gaba (Sting - fr:Sting) This image was created with CombineZP by 11 ( It was created out of 11 single images.)., CC BY-SA 3.0, via Wikimedia Commons
Nobody thinks about backups until the moment they desperately need one, and by then it's about four hours too late. The drive starts clicking. The folder is empty. The laptop won't boot past the logo.
Here's the uncomfortable truth: every hard drive and SSD you own is on a countdown. Some have years left. Some have months. A bad power surge, a spilled coffee, a ransomware email, or one careless drag-and-drop can do the job just as fast.
The good news is that Windows users can build a genuinely solid backup routine without paying a subscription. Let's set it up.
What 3-2-1 Actually Means
The rule has been around for decades because it works:
- 3 copies of your data (the original plus two backups)
- 2 different types of media (say, an internal drive and an external USB drive)
- 1 copy stored offsite, physically somewhere else
That's the whole philosophy. Redundancy plus distance. Now let's translate it into a weekend project.
Step 1: Figure Out What's Actually Irreplaceable
Before you back anything up, open File Explorer and be honest about what would hurt to lose. For most people it's a short list:
- Documents, spreadsheets, and PDFs
- Photos and home videos
- Tax records and financial files
- Browser bookmarks and saved passwords (export them)
- Game saves and project files
- A text file of software license keys
The bulk of this lives in your user folder: C:\Users\YourName\Documents, Pictures, Desktop, Downloads, and Videos. Some apps keep data in AppData, but be selective there — copying the whole folder can drag along gigabytes of cache you don't need.
Check Settings > System > Storage to see how much space you're working with. A 2TB external drive runs well under $100 in the US and will hold most personal libraries with room to spare.
Step 2: Set Up the Local Copy
This is copy number two, and you want it automatic, because manual backups stop happening around week three.
Built-in option: File History. It's not glamorous, but it's free and already installed. On Windows 11, open Control Panel > File History (or search "File History" in the Start menu) and point it at an external drive. It keeps versioned snapshots, which means you can roll a file back to how it looked last Tuesday.
Free third-party options worth a look:
- FreeFileSync — a straightforward sync tool with mirror and two-way modes plus scheduling. Great for people who want to see exactly what's being copied.
- Duplicati — encrypted, versioned backups to cloud storage like Google Drive, OneDrive, or Backblaze B2. A little technical, but extremely capable.
- Hasleo Backup Suite Free and AOMEI Backupper Standard — both offer file backup, disk imaging, and scheduling in their free tiers. Feature-limited compared to the paid versions, but the free tiers are genuinely usable.
One note for anyone following old tutorials: Macrium Reflect Free, long the darling of budget backup guides, was retired back in 2024. If a guide points you there, it's out of date.
Step 3: Make a Full System Image
File backups save your documents. An image saves your entire machine — Windows, apps, settings, the works — so you can restore a working PC instead of rebuilding from scratch over a weekend.
You have options:
- Built-in: Control Panel > System and Security > Backup and Restore (Windows 7) > Create a system image. Yes, it says Windows 7. Yes, it still works on Windows 11. It's legacy, but functional.
- Command line:
wbadmin start backup -backupTarget:E: -include:C: -allCritical -quiet(swapE:for your backup drive). - Free imaging tools: Hasleo and AOMEI both include system imaging with bootable rescue media, which is the safer long-term bet since Microsoft could retire the legacy tool at any time.
Important: any image is useless without bootable recovery media. Create a USB recovery drive from within your backup tool, and label it. A sticky note on the drive goes a long way.
Monthly images are plenty for most home users. Daily or weekly file backups handle everything in between.
Step 4: Get One Copy Out of the House
This is the step people skip, and it's the one that saves you from fire, theft, flooding, and a power surge that takes out every drive plugged into the same outlet.
Cheap ways to do it:
- Rotate two external drives. Keep one at home, one at a friend's place or in a desk drawer at work. Swap them monthly.
- Use free cloud tiers. OneDrive gives you 5GB free, Google Drive gives you 15GB. That covers documents, but not photos.
- Use cheap object storage. Backblaze B2 and similar services charge pennies per gigabyte. Pair with Duplicati or rclone and your offsite copy costs less than a coffee most months.
Step 5: Test the Restore — The Step Everyone Skips
A backup you've never restored from isn't a backup. It's a hope.
Do this once a quarter:
- Pick three random files from your backup and restore them to a temp folder.
- Open them. Do they load? Are they the right version?
- Boot from your recovery USB on a spare machine (or your own, if you don't mind the reboot) and confirm it can see your backup drive and your image.
Fifteen minutes, twice a year minimum. It's the difference between finding out your backup was broken today versus finding out during a crisis.
Mistakes That Quietly Ruin Backups
- Leaving the backup drive plugged in 24/7. Ransomware encrypts connected drives first. Unplug it after each backup.
- Mirroring without versioning. A mirror copy instantly reflects a corrupted or deleted file. Keep some history.
- Backing up to the same physical drive. That's not a backup, that's a folder.
- Never checking drive health. Run
chkdskoccasionally, and consider a free SMART reader like CrystalDiskInfo to catch a failing drive early. - Encrypting the backup and losing the password. Store the recovery key somewhere that isn't the encrypted drive.
- Forgetting browser passwords and bookmarks. Export them; they don't live in your Documents folder.
A Schedule You'll Actually Keep
- Weekly: automatic file backup to the external drive
- Monthly: refresh the system image, then swap the offsite drive
- Quarterly: restore test, 15 minutes
- Annually: replace aging drives and review what you're backing up
Start This Weekend
Buy one external drive. Plug it in. Point File History or FreeFileSync at your user folders. Create a recovery USB. Unplug the drive and put it somewhere that isn't next to the laptop.
That's already better than 90% of home PCs. Everything after that is polish — and polish is a whole lot easier to add when you're not crying over a dead drive.